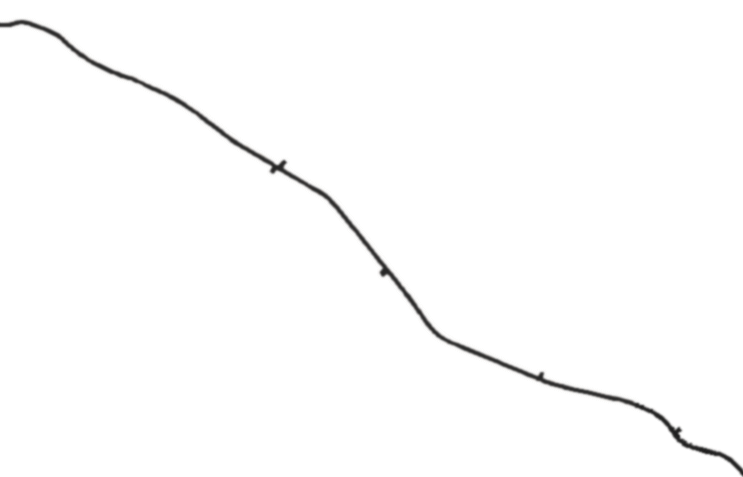
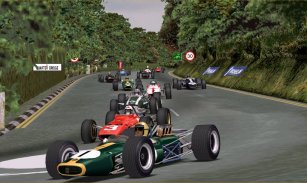
From the start as you accelerate away south west down the GLENCRUTCHERY ROAD, be aware that at each of the many crossroads on the course, there is a slight bump. However the two crossroads before BRAY HILL, being on a fairly straight section, wont unsettle the car.
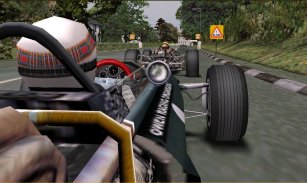
After passing under the Norton banner and if traffic allows, the ideal line over BRAY HILL, WHICH IS BLIND AND SO MUST BE TAKEN ON TRUST, is from the RHS [Right Hand Side] angling to apex the LHS [Left Hand Side] curb at the crest. As the car will loose some steering response after the crest, YOU NEED TO HAVE 'PRESET' THE CORRECT LINE TO JUST AVOID THE JUTTING RHS CURB AT THE BASE OF THE HILL BUT NOT WANDER TOO FAR LEFT. DO THIS BY FLICKING THE CAR TO THE RIGHT SLIGHTLY JUST AS YOU GO OVER THE CREST
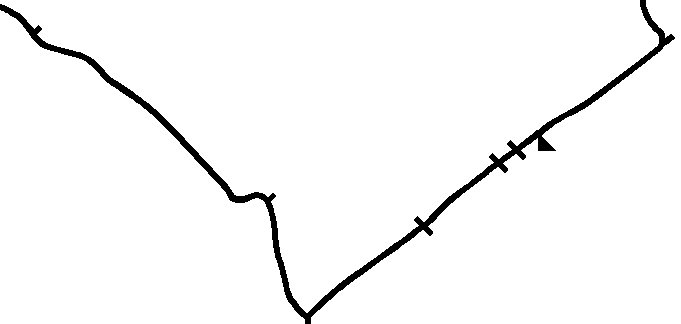
As the car lands, ease the car back to straight, then apply some throttle before the swiftly approaching AGO'S LEAP where the car will briefly become airborne. As soon as you land its time to start some smooth and heavy braking, as you are now fast approaching QUARTER BRIDGE on an increasingly steeper downhill gradient, so braking distances are longer than you might think.
SPECIAL CARE IS REQUIRED BRAKING HERE - ON THE FIRST LAP ON COLD TYRES YOU WOULD THINK YOU WOULD HAVE TO BRAKE EARLIER THAN ON SUBSEQUENT LAPS, WHEN TYRES HAVE GOOD GRIP, BUT IN FACT THE OPPOSITE IS TRUE, YOU NEED TO BRAKE EARLIER ON THE 2ND AND SUBSEQUENT LAPS BECAUSE YOUR TERMINAL SPEED IS GREATER APPROACHING AGO'S LEAP.
IT IS VITAL TO GO OVER AGO'S STRAIGHT. IF YOU DONT , YOU WONT BE ABLE TO BRAKE IN A SHORT ENOUGH DISTANCE.
QUARTER BRIDGE is a slow 1st gear right hander that turns you west to cross more than half the width of the island, untill you reach BALLACRAINE. Caution on the first lap with cold tyres and make sure you dont skid on the painted roundabout!.
After QUARTER BRIDGE, accelerate hard up to 3rd before braking to the RHS. Go back to 1st for the entry to the slow left/right combination at BRADDAN BRIDGE. An 'inside' LHS pass against the AI is possible here if you are good.
Make sure you slow sufficiently to meet the uphill LHS apex next to the white railing, because you need to stay well to the left initially. To get a good change of direction over the crest and a good apex as you drop down through the following right hander, give the steering a little flick just before the RH curb is reached. This will rotate the car while the car drops into the exit and allow early acceleration towards the church.
Please note that after the start, the AI do not assume a strict racing line untill just before BRADDAN BRIDGE, so be aware that they will change position a lot on the first lap until then.
Accelerate hard once again from BRADDAN BRIDGE up to 4th.and on your second and subsequent laps, your pitboard will be shown here, so have a quick glance at the details of the lap just completed, then brake and change down to 3rd for UNION MILLS, which consists of two closely following sets of third gear right/left combinations without much camber.
'Straight line' the first right, but back off sufficiently through the first left to stay on the LHS of the road after the apex. This will make your entry to the next right easier and set up early acceleration out of the last left.
2 UNION MILLS TO BALLACRAINE
On a flying lap, if you get this line right, you can safely go over the top flat out at 160 mph in 5th. Back off as the road falls away and the car becomes light to avoid overreving the engine and land with your wheels straight.
Full throttle now and up to 5th for the all out 'thrash' to BALLACRAINE, which consists of a straight, a double kinked right hander with several bumps, then a straight.
BALLACRAINE is a bit deceptive, as it looks right angled and tight. Although it does have a tight radius, it is nowhere near being right angled, so finish your braking early and take an early apex into BALLACRAINE in 2nd. Do that and you can get some great exit speed, 'powering up' against the camber in the road.
BRAY HILL
START/FINISH
AGO'S
LEAP
QUARTER
BRIDGE
BRADDAN
BRIDGE
UNION
MILLS
GLENCRUTCHERY
ROAD
PITS
After CROSBY , stay on full throttle past THE HIGHLANDER.sign still in 5th until you see the SLOW sign. START BRAKING SMOOTHLY HERE, then go back to 3rd, keeping to the centre of the road before taking a slower left hander that drops away slightly.
There are some unsettling undulations here, SO BACK OFF EARLY AND BRAKE SMOOTHLY DOWN TO 2ND, allowing the car to drift through.the double left at GREEBA CASTLE You then need to ease the car very quickly to the RHS after the second of the GREEBA CASTLE lefts, to ensure a good approach to the rest of this tricky combination, a slight right hand kink, then double left hander through a dip, followed imediately by a right hander at APPLEDENE.at whose exit is the jutting bank of one last slight left hander
DONT TRY TO FORCE THIS COMPLEX SECTION, DRIVE IT SMOOTHLY , LEARN YOUR CHANGE IN DIRECTION POINTS AND MEET YOUR APEXES
.
Pit Board
I
Getting early acceleration out of the last left hander at UNION MILLS and keeping to the LHS allows a passing opportunity against the AI, who will tend to stick to the RHS after exit.
After GLEN VINE you can get on full throttle and up to 5th , even through the CROSBY sweeper if you pick the correct line.
Flat out through CROSBY, you need to start to ease the car slightly to the right over the bumps at the pub for the correct approach to the Wagon and Horses jump, but you can stay on full throttle over this, even though the cars get delightfully airborne. Should you go over a bit crooked, the car will still land safely, even if it comes down on one side first, so "press on" regardless! BUT STAY AWAY FROM THE LHS AT THE CREST !!
From there you can accelerate up to the straightforward left at GREEBA BRIDGE one of the few corners here that are not influenced by the exit from or approach to, another corner.. Its faster than you think at first and you can go much closer to the wall on the left than you might think,before accelerating hard from the apex.
1
3
4
2
3
2
3
4
3
5
1
2
UNION
MILLS
GLEN
VINE
THE
HIGHLANDER
GREEBA CASTLE
CROSBY
5
3
3
4
5
4
GREEBA
CASTLE
GREEBA
BRIDGE
BALLACRAINE
2
4
5
3
APPLEDENE
Be aware though as you accelerate away on the LHS that the gentle right hand sweeper and undulations you see ahead, turn into a slower tightening 3rd gear right hander, also without a lot of camber, at GLEN VINE. This is a very satisfying corner to get right. The key to it is to find a turn in point that is going to give you an apex just around the corner out of initial sight, from where you can drift nicely wide under hard acceleration with safety.
ITS NOT GOOD TO BE CAUGHT OUTSIDE ANOTHER CAR NEGOTIATING THIS.